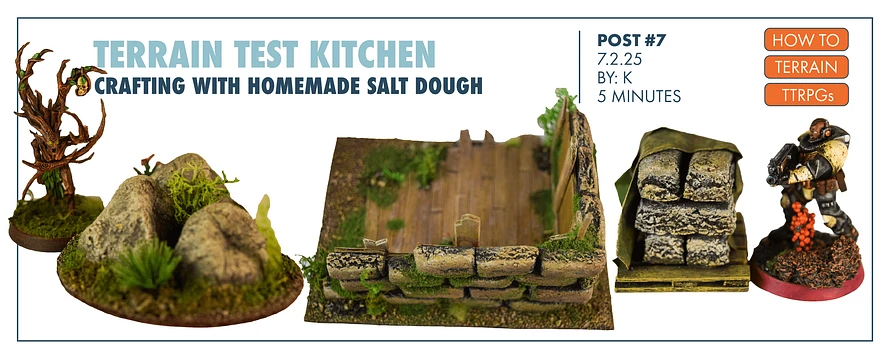
A simple, versatile, and budget-friendly way to craft a wide range of terrain for your tabletop games
Welp, apparently I’m getting old. I’ve reached the life stage where I need to help the kids with school projects. Luckily, the latest project was a relief map of our state that included a recipe for “salt dough”. So we whipped up a big batch and got after it. School project turned out great, in case you are wondering, but the real highlight, selfishly for me, was having a bunch of leftover salt dough. And I couldn’t just let all that go to waste…
I didn’t spend a ton of time experimenting with the salt dough, but was fairly happy with the results. It was easy to work with. Very versatile. Super sturdy. And the best part is that it is extremely inexpensive to make up a whole lot. So, it is a great crafting material if you need to fill up a gaming table with terrain.
There were some downsides and limitations that I discovered, though. Long dry times are probably the biggest detractor, but can easily be navigated with a little patience and planning. Weight is also a negative as it limits the size of any build unless you intend it as a permanent piece on a permanent board. Other than that, I don’t have any complaints though and overall it was just plain fun to play with. There was some minor cracking and warping, but I’m just going to chalk that up to using it for the first time.
Salt Dough Terrain: Quick Pros and Cons
Pros:
- Extremely cheap and easy to make with everyday supplies
- Beginner-friendly and safe for kids
- Air-dries or bakes
- Paintable and texture-friendly
- Great for bulk projects like dungeon tiles or rock scatter
Cons:
- Less durable than resin or epoxy clays
- Can warp if not dried evenly
- May crack slightly during drying
- Not ideal for small or highly detailed sculpting
- Needs sealing for long-term durability
Overall, it wasn’t my favorite homemade crafting material due to the weight and the long dry times. But it is really hard to argue with the price and versatility.
Next time, there are a couple of things I’d try differently to try and improve the outcome. I really want to experiment with some finer salt crystals and mixing some PVA glue and/or cornstarch in there to enhance the texture and make it a little smoother. I’d also like to mix in some paint instead of leaving it plain white. I think that would help cut down on a coat of paint or primer as I found the white clay to be very thirsty and just soak primer.
Since I was simply making use of some excess school project scraps, this time I didn’t give it much thought or planning. But now that I know the pros and cons of building terrain with salt dough, I feel better equipped to produce some better pieces next time. And in the same way, I hope you learn a bit more about crafting terrain with homemade salt dough.
HOW TO MAKE SALT DOUGH FOR TERRAIN
Salt dough is a basic homemade modeling clay using pantry staples: flour, salt, and water, making it extremely inexpensive to whip up oodles of terrain. It is quick and easy to make and has a bunch of potential applications. Its consistency makes it easy to work with and it can take a pattern or texture really well. Once shaped, it can be left to air dry or baked in the oven (at a very low temp) to harden.
🧂 BASIC SALT DOUGH RECIPE:
- 2 parts flour
- 1 part salt (grain size impacts texture)
- 1 part water, added slowly while mixing
OPTIONAL ADD-INS:
PVA glue or cornstarch to strengthen the dough and improve texture.
Pro Tip: Add a bit of acrylic paint or pigment powder to tint the dough. This creates a darker base color that makes painting easier later on.
SALT DOUGH TERRAIN TECHNIQUES AND INSPIRATION
Salt dough is versatile enough for a variety of terrain types. It isn’t a replacement for high-detail sculpting materials like Milliput or Apoxie Sculpt, but it’s perfect in the right situations. Check out this photo gallery of the different kinds of terrain I tried building with salt dough.
Consider using salt dough terrain it if you’re:
- Working on a tight budget
- Building terrain with kids or beginners
- Creating large batches of filler terrain
- Making dungeon tiles or walls where texture matters more than detail
Salt dough is especially handy when quantity is more important than precision. I found that it worked well in these three applications and think that they could be expanded upon to cover most basic builds.
1. Bricks and Stone Blocks 🧱
- Roll out the dough to about ¼ inch (6 mm) thick
- Cut it into rectangles using a hobby knife or pizza cutter
- Press textures into the surface using a rock, sculpting tool, tin foil, or toothbrush
- Let the pieces dry flat, or glue them in place and allow them to harden there
2. Boulders and Scatter Rocks 🪨
- Pinch off small, irregular lumps of dough
- Shape them into rough ovals or jagged forms
- Use a rock, crumpled foil, or coarse brush to texture the surface
- Glue several pieces together on a base to create natural-looking formations
3. Ground Texture and Bases ⛰️
- Spread a thin layer of dough over your terrain base (such as MDF, cardboard, or plastic)
- Sculpt cracks, flagstone, or soil texture using a damp tool
- While the dough is still soft, press in sand, gravel, cork, or other materials for added texture
BONUS: More Terrain Ideas That Work Well with Salt Dough
- Cobblestone Streets or Paths - Roll out dough and stamp individual cobbles using a stylus, pencil tip, or ballpoint pen cap.
- Cracked Desert or Wasteland Bases - Thin layers can be dried to naturally crack, mimicking parched earth.
- Lava or Magma Flows - Sculpt flowing forms with deep grooves, then paint in fiery tones with drybrushed highlights.
- Ruined Floors or Rubble Piles - Combine leftover bricks, broken chunks, and scattered rocks for urban or post-apocalyptic settings.
- Cliff Faces or Cave Interiors - Shape over foam for lightweight rock walls or cave terrain, then carve or texture with rough tools.
BONUS BONUS: Optional Enhancements for More Advanced Builds
Add structure: Mix in sand or fine sawdust for more texture, grit, and realism.
Strengthen builds: Embed toothpicks or wire inside larger pieces.
Layer with foam or cardboard: Use salt dough as a top layer over a lighter layer to save weight and bulk.
🔥 DRYING AND HARDENING
Salt dough can air-dry or be oven-baked, depending on your timeline and project size. Overall, dry time is probably the biggest negative to working with salt dough, so patience is key. Keeping pieces light and thin will also help speed up the dry time and improve the end result.
Air-drying: Leave pieces in a well-ventilated space for at least 2 days, depending on thickness.
Oven-drying: Low and slow is best here to avoid cracking and warping. Bake at 200°F (90°C) MAX for 1 to 2 hours.
Keep the oven door open at the start to let that excess moisture escape
Flip pieces halfway through to prevent warping
Allow them to cool completely before painting
⚠️ Important: Use some common sense if you plan on baking pieces and keep a watchful eye on it in the oven. Do not bake salt dough directly on cardboard, foam, plastic, etc. Use foil or parchment paper to keep it from sticking and then reglue it to the base once dry.
🎨 PAINTING AND SEALING
Once your salt dough terrain is fully hardened, it's ready to paint and seal.
Apply your primer of choice (my go-to for terrain is always the Rustoleum 2x Paint and Primer in black)
Basecoat with craft paint or acrylics (the cheaper the better for this step)
Layer up some lighter colors by dry brushing or dabbing with a sponge to add depth
Slop on washes to accentuate any nooks, crannies, and shadows
Seal with a protective coat of matte Mod Podge, acrylic varnish, or spray sealer
This final step adds durability and helps the terrain resist moisture. In a pinch, watered-down PVA glue can be used as a sealant, but it does add sometimes unwanted shine.
FINAL THOUGHTS
This test project just fell in my lap, but I’m glad that it did. Salt dough is often overlooked in the world of hobby terrain, but it’s surprisingly useful in the right applications. It’s cheap, easy to work with, and ideal for filling up a board with terrain. I look forward to applying what I learned this time around about crafting with salt dough and tackling some more ambitious projects with it next time.
Thanks for reading and I hope that this gives you a little spark to try salt dough terrain for yourself. Be sure to share your pictures, thoughts, and process, we’d love to see it and learn from you. And if you are already a salt dough veteran, drop a comment below with your favorite tips, tricks, and projects.
Thanks again and happy hobbying!